
How to Install Windows 10 from a USB Flash Drive ( 2021)


Here's how to create a bootable Windows installation USB drive starting with a Windows .iso file or a Windows Setup DVD.
What you need
- Windows 10 install .iso or DVD
- USB flash drive with at least 5GB free space. This drive will be formatted, so make sure it doesn't have any important files on it.
- Technician PC - Windows PC that you'll use to format the USB flash drive
- Destination PC - A PC that you'll install Windows on
Step 1 - Format the drive and set the primary partition as active
Connect the USB flash drive to your technician PC.
Open Disk Management: Right-click on Start and choose Disk Management.
Format the partition: Right-click the USB drive partition and choose Format. Select the FAT32 file system to be able to boot either BIOS-based or UEFI-based PCs.
Set the partition as active: Right-click the USB drive partition and click Mark Partition as Active.
Note
If Mark Partition as Active isn't available, you can instead use diskpart to select the partition and mark it active.
Step 2 - Copy Windows Setup to the USB flash drive
Use File Explorer to copy and paste the entire contents of the Windows product DVD or ISO to the USB flash drive.
Optional: add an unattend file to automate the installation process. For more information, see Automate Windows Setup.
Step 3 - Install Windows to the new PC
Connect the USB flash drive to a new PC.
Turn on the PC and press the key that opens the boot-device selection menu for the computer, such as the Esc/F10/F12 keys. Select the option that boots the PC from the USB flash drive.
Windows Setup starts. Follow the instructions to install Windows.
Remove the USB flash drive.
windows 10 pro, windows 10 20h2, windows 10x, windows 10 screen recorder, windows 10 customization, windows 10 update, windows 10 startup sound, windows 10 version 20h2, windows 10 tips and tricks, windows 10 aesthetic, windows 10 automatic repair, windows 10 antivirus, windows 10 activation using cmd, windows 10 arm, windows 10 android, a windows 10 laptop, a windows 10 computer, a windows 10 product key, windows 10 bluetooth, windows 10 blue screen, windows 10 bootable usb, windows 10 black screen fix, windows 10 brightness control, windows 10 camera not working, windows 10 cannot connect to wifi, windows 10 clean up, windows 10 change username, windows 10 connect to wifi, windows 10 camera settings, clean drive c windows 10, windows 10 debloater, windows 10 desktop customization, windows 10 dark mode, windows 10 download usb, windows 10 desktop, windows 10 display settings, windows 10 dark theme, pentium d windows 10, format drive d windows 10, windows 10 error, windows 10 enterprise, windows 10 easter eggs, windows 10 education, windows 10 equalizer, windows 10 format, windows 10 free, windows 10 features, windows 10 factory reset, windows 10 freezing, windows 10 fast startup, windows 10 font change, chkdsk /f windows 10, windows 10 f keys functions, windows 10 f drive missing, windows 10 gaming, windows 10 gaming edition, windows 10 graphics settings, windows 10 ghost spectre ,Download Windows 10. OR 64BIT 32BIT
Make sure your device meets the minimum system requirements
For the latest version of Windows 10, you’ll need to have the following:
CPU: 1GHz or faster supported processor (Here is a list of supported CPUs)
RAM: 1GB for Windows 10 32-bit or 2GB for Windows 10 64-bit
Storage: 32GB of space or more
GPU: DirectX 9 compatible or later with WDDM 1.0 drriver
Display: 800x600 resolution or greater
Internet connection: Some versions of Windows 10 require an internet connection during setup.
Configure boot order using BIOS
If you're dealing with a legacy BIOS firmware, you can change the boot order with these steps:
- Start the computer.
- As soon as the computer starts booting up, press one of the function keys (F1, F2, F3, F10, or F12), the ESC, or Delete key.
- While in the motherboard firmware settings, open the Boot page.
Set the boot order to start from the USB media with the Windows 10 installation files.
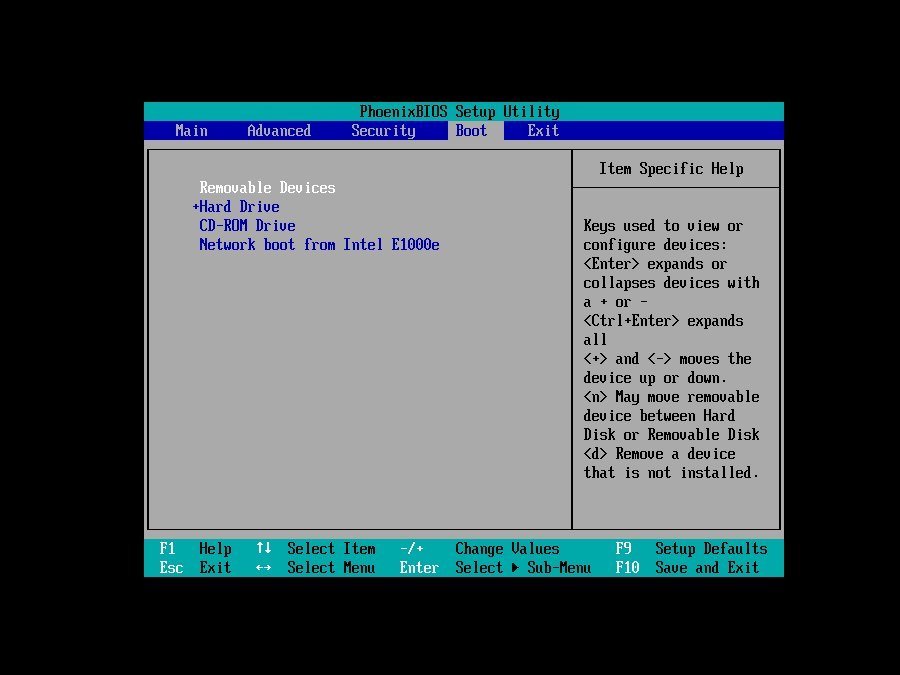
- Save the changes.

Once you complete the steps, the device should be able to start from the USB flash drive.
Disconnect non-essential peripherals
Connected peripherals usually are the reason for problems during the Windows 10 installation process. If you have non-essential peripherals connected to the computer (such as removable storage and other USB and Bluetooth devices as well as printers, scanners, cameras, and others), it's recommended to remove them.
When preparing to do a clean install of Windows 10, you only need a monitor, keyboard, mouse, and an internet connection. After the setup, you can reconnect the peripherals (one at a time) to make sure they don't cause any issues.
How to make a Windows 10 Bootable USB Drive (With Rufus)
Learn how to make a windows 10 bootable USB drive or Pendrive with Rufus, step by step, and how to still use the drive for normal works after making it bootable. Yes, guys in this article I am going to show you the professional use of Rufus to make bootable media properly, to install windows 10 or Linux on your laptops and desktops. Also in single-board computers like Lattepanda alpha and another Mini computer that supports Windows or Linux.
So all you need a Microsoft media creation tool, Rufus setup from their websites. A USB drive of at least 4GB or more and a proper internet or WiFi connection on a PC. Before starting the process make sure to backup or copy any important files on a USB drive if have because all files will be deleted/formatted during the media creation. For a fresh start, you have to download the updated copy of the Microsoft Windows 10 ISO file (which is free of cost) see the steps below, or you can also use your windows DVD, as well as the process, is almost the same. Just follow the steps below:
Step 1: Download the RUFUS from here: GOOGLE DRIVE
Step 2: OR download Rufus setup: https://rufus.ie/
Step 3: Open up Rufus (its portable no need to install)
Step 4: Your USB drive will auto-detect in Rufus no need to select (if you have any other drive plugged in then make sure to select your USB drive on Rufus)

Step 5: Select ISO as Boot selection, just browse the path where you downloaded the ISO then Open it up.


Step 6: Now label your USB drive with any name, then in the file system select NTFS (why see down in this article)

Step 7: Click the Start button to continue making Windows 10 bootable USB with Rufus.

Congratulation !! you just created your bootable media, now you can install windows 10 to any supported computer. Pro tip hide the windows files inside the USB to use your drive as a normal flash drive. Hiding windows files helps to keep those files safe and now your media is bootable and you can use the rest of the space for your normal works.
Why I selected NTFS for the file System ??
If you continue with the Fat32 then you will no longer be able to copy files to the USB drive which is larger than 4GB, you will get the following error dialog box saying:So make sure to select the NTFS file system in Rufus

How to install windows with a bootable USB drive ??
Step 1: Plug the bootable USB drive to your laptop or PC (make sure its turned off)
Step 2: Press the power button of your computer and then quickly press the boot menu key to open the boot menu.
Step 3: In the boot menu select USB drive and hit enter, Now you will see the Windows setup.
Note: Boot menu keys for all computers are not the same, see general boot menu keys below:
Lenovo: fn+f12 Asus Laptop: Esc Asus Desktop: f8 HP Laptop: f9 Dell Laptop: f12 Acer: ALT + F2 Toshiba: F12
2021 TAG:
windows 10 pro,
windows 10 screen recorder,
windows 10 customization,
windows 10 update,
windows 10 startup sound,
windows 10 version 20h2,
windows 10 tips and tricks,
windows 10 aesthetic,
windows 10 automatic repair,
windows 10 antivirus,
windows 10 activation using cmd,
windows 10 arm,
windows 10 android,
a windows 10 laptop,
a windows 10 computer,
a windows 10 product key,
windows 10 bluetooth,
windows 10 blue screen,
windows 10 bootable usb,
windows 10 black screen fix,
windows 10 brightness control,
windows 10 camera not working,
windows 10 cannot connect to wifi,
windows 10 clean up,
windows 10 change username,
windows 10 connect to wifi,
windows 10 camera settings,
clean drive c windows 10,
windows 10 debloater,
windows 10 desktop customization,
windows 10 dark mode,
windows 10 download usb,
windows 10 desktop,
windows 10 display settings,
windows 10 dark theme,
pentium d windows 10,
format drive d windows 10,
windows 10 error,
windows 10 enterprise,
windows 10 easter eggs,
windows 10 education,
windows 10 equalizer,
windows 10 format,
windows 10 free,
windows 10 features,
windows 10 factory reset,
windows 10 freezing,
windows 10 fast startup,
windows 10 font change,
chkdsk /f windows 10,
windows 10 f keys functions,
windows 10 f drive missing,
windows 10 gaming,
windows 10 gaming edition,
windows 10 graphics settings,
windows 10 ghost spectre
Windows 10 Version 20H2 64-bit English (5.7 GiB, 79,285 hits)
Windows 10 Version 20H2 32-bit English (4.2 GiB, 25,736 hits)
Windows 10 Version 1909 64-bit English (5.0 GiB, 437,784 hits)
Windows 10 Version 1909 32-bit English (3.5 GiB, 26,445 hits)
Download Windows 10 using the Windows Media Creation Tool
If you want to do a new installation of Windows 10 then you can download the Windows 10 Windows Media Creation tool. This will automatically download Windows and create a bootable media like USB or DVD for you. The media creation tool acts as a Windows 10 download tool plus a bootable USB builder. You can perform a clean install as well as upgrade your current installation.
Follow the steps below:
- Download the Windows 10 Media Creation tool from here.

Windows 10 Version 1809 Media Creation Tool - Accept the License Agreement.

Windows 10 Media Creation Tool license agreement - Select Create installation media (USB flash drive, DVD, or ISO file) for another PC. The first option for Upgrade PCs will now do the same thing as Windows 10 Upgrade Assistant.
- Select Language, Edition and Architecture from the next screen.

Select Language Architecture and edition Windows 10 Setup - Select the installation media or if you haven’t plugged in the USB flash drive or DVD, you may download the bootable ISO file.

Choose media Windows 10 setup
Download Windows 10 ISO directly from Microsoft without Media Creation Tool
You can easily access any version of Windows 10 from this Microsoft download link. The problem with this link is that if you open the link on a Windows 10 PC, it will automatically detect and force the user to download the media creation tool first. The media creation tool can download the ISO but it is not a very pleasant experience. If you want to use a download manager, then you will need the direct download links.
Here, we will discuss how to download Windows 10 ISO directly without Media Creation Tool. This method is useful especially when you want to download the ISO in any other language of choice other than English.
The supported languages include the following:
- English (United States)
- English (United Kingdom)
- Chinese (Simplified)
- Portuguese (Brazilian)
- German
- French
- French (Canada)
- Russian
- Japanese
- Italian
- Dutch
- Spanish
- Spanish (Latin America)
- Polish
- Turkish
- Swedish
- Czech
- Arabic
- Korean
- Chinese (Traditional)
- Finnish
- Thai
Let’s first understand the logic. Microsoft’s media creation tool is only for Windows. If you open the same page using another device like Android, macOS, etc., Microsoft will give you the download links. We can trick Microsoft into thinking that we are not using Windows. This can be done if we are using Google Chrome, Firefox or even Safari. We will only discuss how to do this in Chrome and Firefox only.
For Chrome, follow the instructions below:
- Open Microsoft Windows 10 download webpage on Google Chrome.
- Press Ctrl + Shift + i to open the Inspect panel

Open inspection panel in Chrome - Press the three vertical dots icon in the top right corner of the inspect window.
- Go to More Tools –> Network Conditions.

Open network conditions - Under User Agent, uncheck select automatically.
- The above steps will enable a drop-down list just below the checkbox. Select anything other than Windows. For example, I chose Chrome OS.

Select user agent in Chrome - Without closing the inspect panel, hit the reload button or press F5. This will re-open the same Windows 10 download page but with a drop-down menu to select the edition of Windows ISO you want to download.

Select the Windows edition to download - Select the edition of Windows 10 to download (normally the top one which is the latest) and press the Confirm button.
- Next, you will need to select the product language. Choose which language you want to download the ISO in and click the Confirm button.

Select the product language - You will be provided with two buttons on the next screen.
64-bit Download
32-bit Download
Click on the appropriate link and the download will start immediately.
Windows 10 download links
Please note that these download links will only be valid for 24-hours only. So you need to complete the download process before the expiration time.
If you are using Firefox, you can use the user agent switcher addon to change the user agent.
Product key and installation
You may use the following product keys for Windows 10 installation and activation:
Windows 10 Product Activation Keys All Editions
You may burn the downloaded ISO file to a DVD or make a bootable USB drive in order to install Windows 10. If you want to upgrade Windows 7 or Windows 8/8.1 to Windows 10, then you should mount the ISO file and run the setup from within Windows Desktop.
Here are some basic questions from users which I’m addressing here. If you have any questions regarding Windows 10 download, you can leave a comment below.
Can the downloaded ISO file be used for recovery purposes?
Yes, the ISO can be used for troubleshooting and recovery.
How long will it take to install Windows 10?
It depends upon the system hardware. Normally, it takes between 15 to 30 minutes for the installation process to be completed.
How long does it take to download Windows 10 ISO?
It depends upon the Internet connection bandwidth. Since all our mentioned links are from Microsoft servers, it should not take long if you have a good Internet connection.
How much space should the USB/DVD drive have to make a bootable image?
At least 8GB of storage device is required to make a bootable Windows 10 media.
I hope you enjoy the latest version of Windows 10 as much as I do. Feedback from you will be highly appreciated. Please leave a comment below and let us know what you think.


Comments
Post a Comment